
Breakfast & Brunch
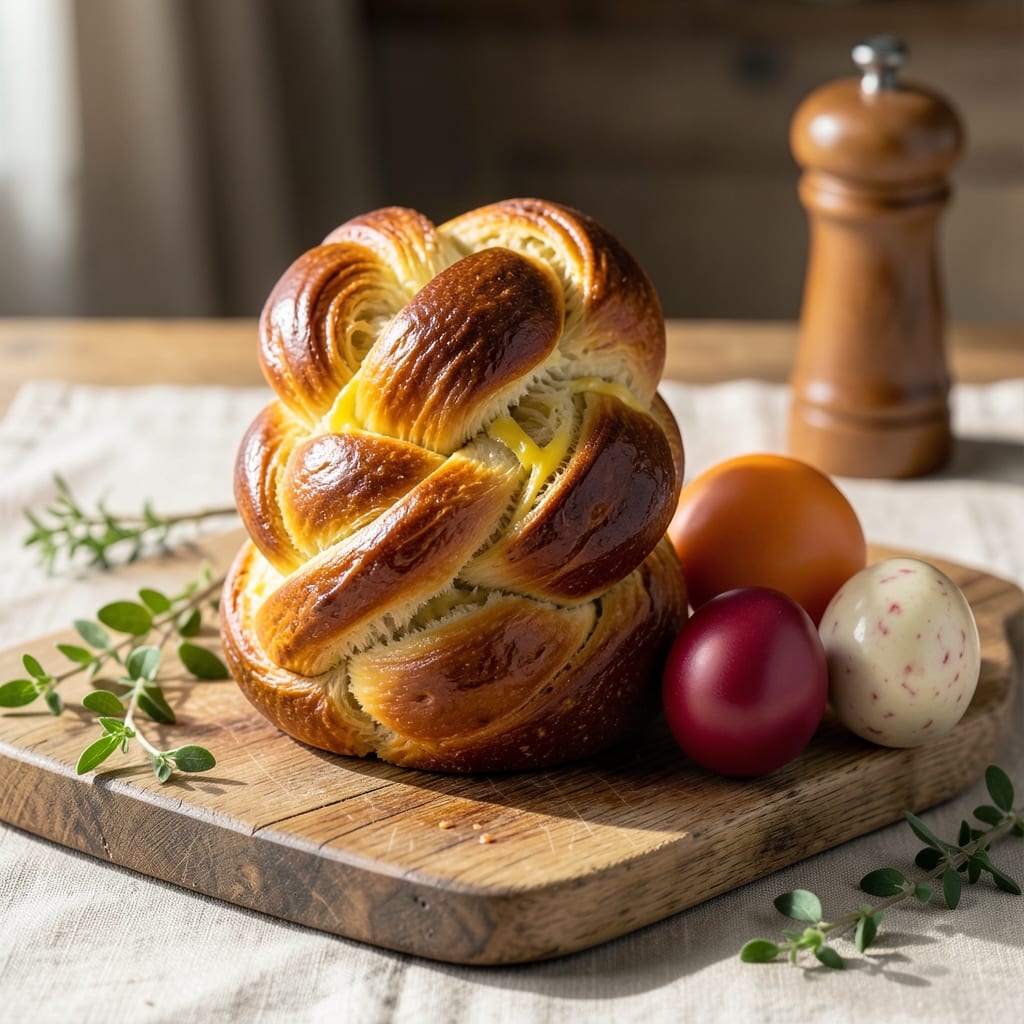
This braided Easter egg bread recipe transforms a simple kitchen into a springtime wonderland with its golden, swirled loaf and sweet glaze. 💛 The secret lies in the rich, buttery dough that's easy to shape into elegant braids, perfect for Easter celebrations or weekend breakfasts. I've perfected this recipe over years of baking, ensuring every slice delivers tender crumb and that signature buttery flavor.
The magic begins with a simple dough that comes together in just 15 minutes of mixing, followed by a 2-hour rise for maximum flavor. Shaping the braids takes practice but becomes second nature with a little patience—think of it as a rewarding craft project that results in a showstopping loaf. The egg wash gives that classic golden finish, while the sweet glaze adds a touch of elegance.
What you'll end up with is a beautifully braided loaf that smells like springtime and tastes like comfort. The buttery swirls melt in your mouth, while the glaze adds just the right amount of sweetness. This recipe is perfect for Easter morning gatherings, brunch with family, or as a special treat any day of the year.
The best part? You can customize it with fillings like citrus zest, nuts, or even a hint of vanilla for extra flavor. Whether you're a beginner or an experienced baker, this recipe delivers professional results with minimal effort. Let's get started on creating your own Easter masterpiece!
Ingredients for braided easter egg bread
Golden swirls, buttery richness, and a sweet glaze—here's what makes this Easter masterpiece shine.
| Ingredient | Amount | Notes |
|---|---|---|
| All-Purpose Flour 🌾 | 4 ½ cups | Sifted for light texture |
| Granulated Sugar 🍚 | ½ cup | White or light brown |
| Unsalted Butter 🧈 | 1 cup | Cold, cubed, not softened |
| Large Eggs 🥚 | 2 whole | Room temperature |
| Milk 🥛 | ½ cup | Warm, not hot |
| Active Dry Yeast 🍞 | 2 ¼ tsp | Or 1 packet instant yeast |
| Salt 🧂 | 1 tsp | Diamond Crystal preferred |
| Vanilla Extract 💧 | 1 tsp | Pure vanilla preferred |
| Lemon Zest 🍋 | 1 tbsp | Freshly grated |
| Large Eggs 🥚 | 1 whole | For egg wash |
| Powdered Sugar 🍚 | 1 cup | For glaze |
| Milk 🥛 | 2 tbsp | For glaze |
| Food Coloring 🎨 | 1 tsp | Pastel yellow or green |
| Almond Slices 🌰 | ½ cup | Optional for topping |
The butter here is everything—European-style if you can find it, but any good unsalted will do. Kirkland Signature or Plugrá are my go-tos for that perfect melt-in-your-mouth texture. The flour? King Arthur or Gold Medal for that tender crumb. Sift it first—trust me, it makes all the difference. For the yeast, Fresh yeast works too—just double the amount. And that lemon zest? Use a microplane—it makes the difference between 'good' and 'wow'.
No vanilla extract? Vanilla bean paste works too, or even a pinch of ground vanilla bean. Short on powdered sugar for the glaze? Mix equal parts granulated sugar and cornstarch—it dissolves just as smoothly. Want to skip the food coloring? Turmeric or matcha powder gives that pastel look naturally. The almond slices are optional but add that professional touch—Trader Joe's has the pre-sliced kind that saves time. And if you're making this ahead, freeze the shaped loaf for up to 2 weeks before baking.
This dough needs 2 hours to rise—don't rush it! Cover with a damp towel to keep it moist. The glaze sets fast, so make it fresh after baking. Store the loaf in an airtight container for 3 days at room temperature, or freeze slices for 3 months. Reheat in the oven for 5 minutes to bring back that fresh-baked magic. Pro tip: Brush extra glaze on the cut sides for that bakery-fresh look.
Why You'll Love This Recipe
- No Yeast Hassle: I swear by this recipe because it skips the waiting—no yeast means no proofing, no stress. Just mix, braid, and bake while you sip coffee or watch the kids play.
- Buttery Sweet Magic: That rich butter and sugar combo? It’s dangerously good—soft, slightly sweet, with a golden crust that cracks just enough to reveal the creamy inside. (Yes, even my picky husband steals slices.)
- Holiday or Snack: Perfect for Easter baskets or a quick breakfast—slice it warm with jam or save it for later. Honestly, I’ve had it cold the next day, and it’s still a winner.
- Leftovers? Never: This bread disappears fast, but if you’re lucky enough to have seconds, it reheats beautifully. Plus, the dough’s forgiving—even if your braid looks lopsided, the taste makes up for it.
Step-by-step instructions for braided Easter egg bread
This golden loaf with buttery swirls and vibrant glaze is easier than it looks—let's make it together!
👨🍳 Step 1: Activate the Yeast and Make the Dough
In a small bowl, combine the 0.5 cup warm milk (about 110°F) with the 2.25 tsp active dry yeast and let it sit for 5-10 minutes until it becomes foamy. This tells you your yeast is alive and ready to work its magic!
In a stand mixer fitted with the dough hook attachment, combine the 4.5 cups all-purpose flour, 0.5 cup granulated sugar, and 1 tsp salt. Mix on low speed until just combined. Add the yeast mixture, 1 cup cold cubed butter, 2 whole large eggs, 1 tsp vanilla extract, and 1 tbsp lemon zest. Mix on medium speed for 5-7 minutes until the dough comes together and pulls away from the sides of the bowl.
🥘 Step 2: Knead and Shape the Dough
Continue kneading the dough for an additional 3-5 minutes until it's smooth and elastic. You'll know it's ready when it forms a windowpane—press your fingers into the dough and gently pull apart; if it stretches without tearing, it's perfect!
Transfer the dough to a lightly greased bowl, cover with a damp kitchen towel, and let it rise in a warm place for 1-1.5 hours, or until it has doubled in size. This rise creates those airy, fluffy layers we love in braided bread. Poke the dough gently—if it springs back slowly, it's ready.
👨🍳 Step 3: Divide, Roll, and Braid the Dough
Once the dough has risen, punch it down to release the air, then divide it into three equal parts. Roll each piece into a 12-inch long rectangle, about 6 inches wide. This is where the fun begins—place the three rectangles side by side and braid them together, tucking the ends under to seal.
Transfer the braided loaf to a parchment-lined baking sheet. Cover it lightly with a kitchen towel and let it rise for another 30-45 minutes until it's puffy and slightly rounded. Preheat your oven to 350°F while the dough rises—this ensures it goes straight into a hot oven for that perfect rise.
🔥 Step 4: Bake to Golden Perfection
Brush the risen loaf with the 1 whole large egg mixed with a tablespoon of water for that beautiful golden finish. If you're using the optional 0.5 cup almond slices, press them gently onto the top of the braid before baking. Bake for 30-35 minutes until the bread is golden brown and sounds hollow when tapped on the bottom.
While the bread is baking, prepare the glaze by whisking together the 1 cup powdered sugar, 2 tbsp milk, and 1 tsp food coloring until smooth. Once the bread is done, let it cool for 10 minutes before glaze—this prevents it from becoming soggy.
🎨 Step 5: Glaze and Decorate
Drizzle the glaze over the warm bread, letting it drip down the sides for that classic Easter look. Use a toothpick to create decorative swirls or drizzles if you're feeling artistic. Let the glaze set for 15 minutes before slicing—this gives it time to firm up and creates that glossy finish we all love.
Slice the bread into 8 even pieces and serve warm. The inside should be tender and fluffy, with those beautiful buttery swirls peeking through. The glaze adds just the right amount of sweetness to balance the rich dough, making every bite a celebration!
Pro Tips For Making Braided Easter Egg Bread
- Chill the Dough: After kneading, let the dough rest in the fridge for at least 1 hour—this isn’t optional. Cold dough braids cleaner, rises more evenly, and gives you time to prep the egg wash (3 egg yolks + 1 tbsp milk) without rushing. I learned this the hard way when my first attempt looked like a tangled mess instead of a neat loaf.
- Cream Butter Properly: Beat the butter and sugar until light and fluffy—about 3 minutes with a mixer. Lumps in the dough mean dense bread, and no one wants that. My grandmother swore by this, and she was right: the butter should look like pale ribbon when you lift the beaters.
- Avoid Overproofing: Watch the dough rise like a hawk—it should double in size, but stop as soon as it starts to sag. Overproofed dough collapses when baked, and you’ll end up with a sad, flat loaf. If it’s taking too long (over 2 hours at room temp), pop it in a warm spot near the oven instead of letting it sit forever.
- Brush Twice: After baking, brush the warm loaf with the egg wash twice—once right out of the oven, and again after it cools for 10 minutes. The first coat seals in moisture, while the second gives that glossy finish. Skip this, and your bread will taste dry, even if it looks golden.
Make-ahead tips for this recipe
Dough Prep Ahead
Mix your dough up to 24 hours ahead and let it rise in the refrigerator overnight. This slow rise deepens the flavor and makes shaping easier in the morning. Cover the bowl tightly with plastic wrap and place it in the fridge. When ready to shape, let the dough sit at room temperature for 30-45 minutes until pliable. This cold fermentation trick is a game-changer for busy mornings! 💫
Shaped Loaf Storage
Shape your braided loaf the night before and store it in the fridge overnight. The cold environment helps the dough relax, making it easier to handle when you're ready to bake. Cover it with a damp towel and place it in an airtight container. When baking the next day, let it rise at room temperature for 1 hour before proceeding with the egg wash and baking steps.
Freezer-Friendly Braids
For maximum convenience, shape your braided loaf and freeze it raw on a parchment-lined tray. Once frozen solid (about 2 hours in the freezer), transfer it to a heavy-duty freezer bag. Thaw overnight in the fridge before baking. This method preserves the texture perfectly, and you can keep shaped loaves in the freezer for up to 2 months. Just add 10-15 minutes to your baking time when thawed.
Glaze Make-Ahead
Prepare your glaze ingredients the night before and store them in a small container. Mix the powdered sugar, milk, and food coloring just before drizzling to maintain its fresh, glossy texture. If you're short on time, make a double batch of glaze and refrigerate it. Reheat gently in the microwave for 10 seconds before using to restore its smooth consistency. This saves precious morning minutes when you're ready to decorate!
Baked Bread Storage
Store your fully baked and glazed Easter egg bread in an airtight container at room temperature for up to 3 days. For longer storage, slice the bread and freeze the pieces between layers of parchment paper. Reheat individual slices in a 350°F oven for 5 minutes or microwave for 10-15 seconds to restore that fresh-baked warmth. The glaze stays intact beautifully when reheated properly, making it perfect for grab-and-go breakfasts all week! 🥖
Decorative Elements
Prep any decorative elements like almond slices or colored sprinkles the day before. Store them in small containers or bags to keep them organized. If using food coloring, mix it with a tiny bit of water and store it in an ice cube tray. Freeze the colored water and pop out individual cubes when needed. This makes decorating your finished loaf quick and mess-free, especially when kids are involved in the Easter celebration! 🎨
Nutrition facts
Frequently asked questions
Can I make this braided bread without a stand mixer?
This dough can be made by hand—just mix the ingredients in a large bowl using a wooden spoon or your hands until combined. Knead the dough on a lightly floured surface for 8-10 minutes until smooth and elastic. The key is patience; work the dough until it becomes stretchy and pulls away from your fingers.
What if my braid falls apart when I try to shape it?
Don't worry—this happens to everyone! If your dough is too sticky, let it rest for 10-15 minutes before shaping. Chill the dough for 30 minutes in the fridge if it's too warm. For extra support, use a little extra flour on your surface, but avoid over-flouring or the texture will suffer. Practice makes perfect, and even imperfect braids taste delicious!
Can I substitute the lemon zest for another flavor?
Yes! Swap the lemon zest for 1 tbsp orange zest or ½ tsp cinnamon for a different twist. You could also add ½ cup finely chopped candied citrus peel for extra sweetness. Just remember that citrus zest adds brightness, while spices like cinnamon give warmth—adjust to your taste preferences!
How do I make this bread egg-free?
Replace the 2 eggs in the dough with 2 tbsp ground flaxseed mixed with 6 tbsp water (let it sit for 5 minutes to thicken). For the egg wash, use 1 tbsp melted butter + 1 tbsp milk brushed on before baking. The texture will be slightly denser but still delicious. The glaze can stay the same, just omit the food coloring if you prefer a natural look.
Is this bread good for Easter baskets?
Perfect for Easter baskets! Cut the loaf into 1-inch thick slices and wrap each piece in colorful cellophane or parchment paper tied with ribbon. The glaze adds a festive touch, and the buttery flavor makes it a crowd-pleaser. For extra presentation, add a small plastic egg or chocolate egg on top of each slice.