
Breakfast & Brunch
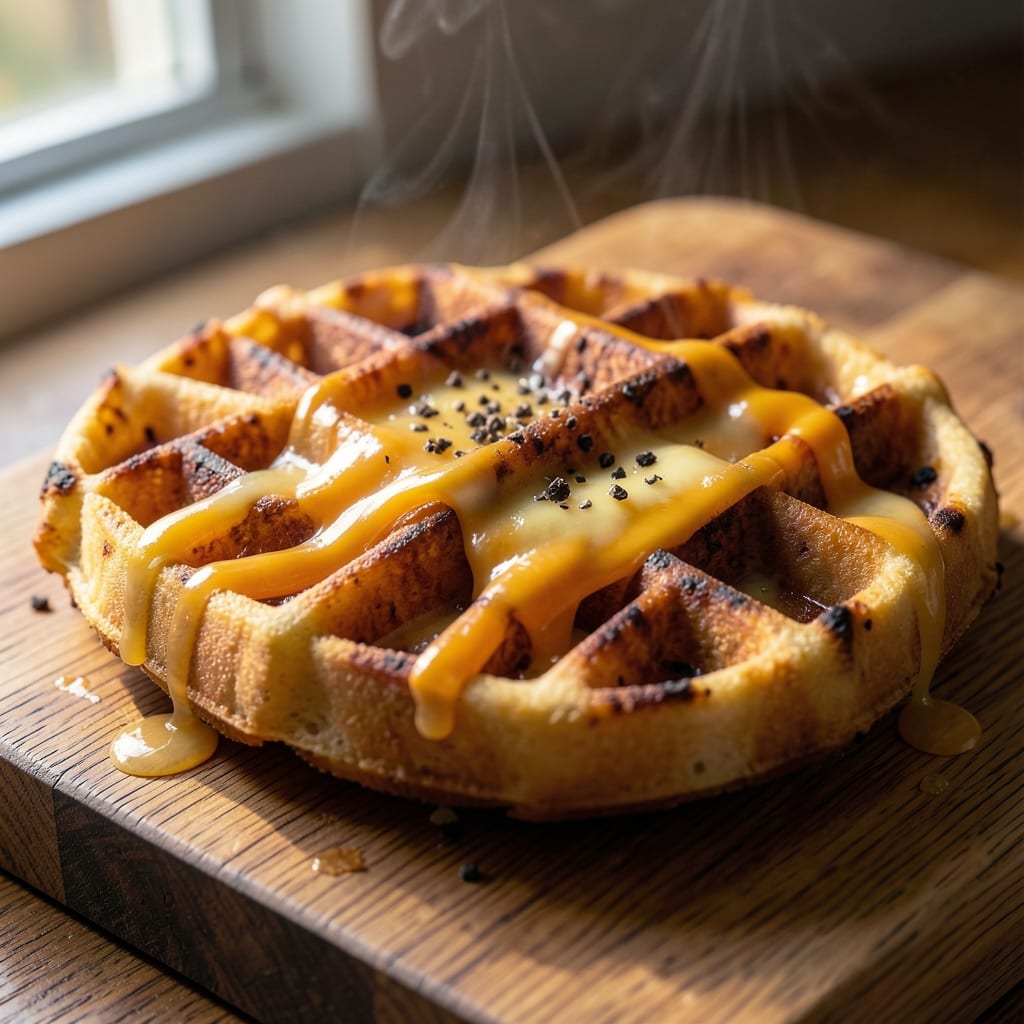
This egg and cheese waffle recipe delivers the perfect balance of fluffy stacks with a golden crust and melty cheese pockets that make every bite irresistible. 💛 The secret lies in incorporating shredded cheese directly into the batter, ensuring it melts into gooey perfection while the waffles cook. Unlike traditional waffles, these require no syrup to taste delicious—though a drizzle of maple adds a touch of indulgence.
What sets these apart is the foolproof technique that guarantees crispy edges and tender centers every time. The batter comes together in minutes with simple pantry staples, and the waffle iron does the rest of the work. Whether you prefer classic cheddar or a blend of mozzarella and gouda, the cheese transforms these into a hearty breakfast that satisfies even the hungriest appetites.
By the time you pull them from the iron, you’ll have golden, crispy waffles with pockets of melted cheese that ooze with every bite. The texture is light yet sturdy enough to hold toppings like fresh fruit, crispy bacon, or a dollop of sour cream. These waffles are versatile enough for brunch, a quick weekday breakfast, or even a savory dinner side.
For extra flavor, try adding herbs like chives or dill to the batter, or swap in pepper jack for a spicy kick. Serve warm with a side of scrambled eggs or avocado for a complete meal. Here’s how to make them perfectly every time.
Ingredients for egg and cheese waffle
Simple staples transform into golden waffles with melty cheese pockets every time.
| Ingredient | Amount | Notes |
|---|---|---|
| Large Eggs 🥚 | 4 whole | Room temperature for best mixing |
| All-Purpose Flour 🌾 | 1 ½ cups | Sifted for light texture |
| Milk 🥛 | 1 ½ cups | Whole milk preferred |
| Shredded Sharp Cheddar Cheese 🧀 | 1 ½ cups | Freshly shredded, low-moisture |
| Baking Powder 🧂 | 1 tbsp | For fluffy rise |
| Salt 🧂 | ½ tsp | Kosher or sea salt |
| Ground Black Pepper 🌶️ | ¼ tsp | Freshly ground preferred |
| Unsalted Butter 🧈 | 2 tbsp | Melted, cooled slightly |
| Vanilla Extract 🍯 | 1 tsp | Pure vanilla for flavor |
| Fresh Chives 🌿 | 2 tbsp | Chopped, optional garnish |
| Maple Syrup 🍯 | ¼ cup | For serving, optional |
The cheese is non-negotiable here—sharp cheddar melts best, but mozzarella or gouda work too. Freshly shredded (not pre-shredded) gives you that perfect melt. I always grab the block cheese from the deli counter—it shreds better and tastes fresher. For the eggs, room temperature makes mixing smoother, so take them out 10 minutes before starting. The baking powder is key for that fluffy texture, so don't skip it. If you're feeling fancy, swap in Pepper Jack for a spicy kick.
No sharp chedddar? Parmesan mixed in adds umami depth. Running low on baking powder? Whisk 1 tbsp cream of tartar + 1 tbsp cornstarch as a substitute. The chives are optional but add a fresh pop—dried chives work at half the amount. For a richer batter, add 1 tbsp sour cream to the mix. And if you're short on butter, olive oil works in a pinch, though it'll change the flavor slightly. The maple syrup is just for serving—these waffles taste amazing plain too.
The batter keeps for 2 days in the fridge, covered tightly. If you make a big batch, freeze portions in single-serving bags—they reheat perfectly in the toaster. For extra crispy edges, preheat your waffle iron on medium-high. And trust me, double-check the cheese is fully melted before serving—nothing ruins a waffle faster than cold cheese pockets. Leftovers? Store in an airtight container for 3 days or freeze for 2 months.
Why You'll Love This Recipe
- Five-Ingredient Magic: I swear by this recipe because it’s the kind of meal that feels like a hug—just eggs, flour, milk, cheese, and a pinch of baking powder. No fancy substitutions, no hunting for obscure spices, and honestly? The first time I made it, I forgot to add the baking powder and still ended up with waffles that tasted like a breakfast revelation.
- Cheese Pulls Every Time: That sharp cheddar gets all melty and gooey in the crispy edges, and I’m not kidding when I say it’s the kind of texture you can’t stop eating. The eggs add richness without being heavy, so you get that perfect balance of salty, savory, and just a hint of tang—like a grown-up grilled cheese but way more exciting.
- Breakfast, Lunch, Snack: I make these for lazy Sunday mornings, pack them for work lunches, and even serve them at brunch when friends over. Freeze extras for a 30-second microwave meal, or toast them fresh for a quick protein boost. Between us, they’re my go-to when I need something that’s not just “food”—it’s a full experience.
- Pantry Staple Power: No weird ingredients or last-minute grocery runs—this recipe uses what you already have. A dollar store bag of cheddar and a carton of eggs stretch for multiple batches, and the leftovers? They last in the fridge for days or freeze perfectly. It’s the kind of meal that makes me feel like I’m winning at life, even on a Tuesday.
Step-by-step instructions for egg and cheese waffle recipe
Here's how to make these fluffy, cheesy waffles with a golden crust and melty center every time.
👨🍳 Step 1: Whisk Wet Ingredients Until Smooth
In a large bowl, crack the 4 whole Large Eggs and add the 1.5 cups Milk, 2 tbsp Unsalted Butter, 1 tsp Vanilla Extract, 0.5 tsp Salt, and 0.25 tsp Ground Black Pepper. Whisk vigorously for 2-3 minutes until the mixture is completely smooth and slightly thickened. You'll notice the eggs become pale yellow and ribbon-like when you lift the whisk.
I like to use a fork first to break up the yolks, then switch to a whisk for better aeration. This step is crucial—it ensures your waffles will be light and fluffy, not dense. If you see any unincorporated yolks, keep whisking until fully combined. The melted butter should be cool enough to mix but still liquid, so it blends seamlessly.
👨🍳 Step 2: Combine Dry Ingredients and Fold In
In a separate bowl, sift together the 1.5 cups All-Purpose Flour and 1 tbsp Baking Powder. This sifting step prevents lumps and creates a lighter texture. Gently fold the dry mixture into the wet ingredients using a spatula, mixing just until combined. You should still see some flour streaks—overmixing develops gluten and makes waffles tough.
Now, add the 1.5 cups Shredded Sharp Cheddar Cheese and fold it in using quick, upward strokes. The cheese should be evenly distributed throughout the batter. Here's the thing—don't worry if the batter looks thick. Cheese adds moisture, and this texture is perfect for chewy, melty waffles. The batter should be like thick pancake batter but with visible cheese chunks.
🔥 Step 3: Preheat Waffle Iron and Cook
Preheat your waffle iron to 375°F and lightly grease both plates with a bit of butter or nonstick spray. Pour about ½ cup of batter onto the center of the iron—it should spread evenly to the edges. Close the lid and cook for 3-4 minutes until the waffles are golden brown and the indicator light turns off.
Don't open the iron before the cooking time is complete—this prevents steam from escaping, which is what creates those beautiful crispy edges and fluffy insides. You'll know they're ready when the edges are golden and the top looks set. If your waffle iron doesn't have an indicator light, use a toothpick inserted into the center—it should come out clean.
🍽️ Step 4: Serve Warm with Maple Syrup
Transfer the waffles to a wire rack and let them cool for 1-2 minutes before serving. This brief rest prevents them from becoming soggy. Top each waffle with a drizzle of 0.25 cup Maple Syrup and sprinkle with 2 tbsp Fresh Chives for a pop of color and freshness.
Here's where it gets fun—stack them high and enjoy immediately while they're warm and cheesy. The syrup will pool beautifully in the crevices, and the cheese will be perfectly melty in the center. For extra indulgence, serve with a side of crispy bacon or fresh berries. These waffles are best eaten fresh—they hold up for about 30 minutes before becoming slightly rubbery.
Pro Tips For Making Egg And Cheese Waffle
- MEASURE MILK AFTER HEATING: I used to dump cold milk straight from the fridge—big mistake. Heat it to 110°F (just warm to the touch) first, then measure it. This keeps the batter from getting lumpy when the eggs and cheese melt in, and the waffles turn out lighter instead of dense. (Yes, even if you're impatient like me.)
- STIR CHEESE UNTIL MELTED: Don’t just toss shredded cheddar into the batter and call it a day. Warm the cheese in a dry pan for 2-3 minutes until it starts to soften, then stir it into the batter. This prevents clumps and ensures the cheese melts evenly in the waffles—no surprise gummy bits when you bite in.
- WAIT FOR GOLDEN BROWN: I learned this the hard way—taking waffles out too soon leaves them pale and gummy inside. Cook until the edges are deep golden brown and the center springs back when pressed (about 3-4 minutes on medium-high). Overcooking? You’ll know—crispy outside, dry inside. Find that sweet spot.
- SWAP FLOUR FOR LIGHTNESS: All-purpose works, but a 50/50 mix with cake flour makes a noticeable difference—waffles stay fluffy longer. If you’re short on time, just sift the flour first. The extra air in the batter means taller, airier waffles that don’t turn into dense pancakes. (Your future self will thank you.)
Pro cooking tips for this recipe
Cheese Melting Secrets
The key to perfect melty cheese is using the right type and temperature. I always opt for sharp cheddar because it melts smoothly rather than clumping. For extra gooeyness, shred the cheese yourself—pre-shredded varieties contain anti-caking agents that prevent proper melting. If your cheese isn't fully melted after cooking, try pre-melting it in the microwave for 10-15 seconds before adding to the batter. 🧀
Batter Consistency Tips
Your batter should be thick but pourable—like heavy pancake batter with visible cheese chunks. If it's too thin, add 1-2 tablespoons of flour at a time until it reaches the right consistency. Too thick? Stir in 1 tablespoon of milk to loosen it. Remember, cheese adds moisture, so don't be surprised if your batter looks denser than traditional waffle batter. The secret is patience—let the cheese distribute evenly before cooking.
Waffle Iron Mastery
Preheating your waffle iron is non-negotiable for crispy edges. I use medium-high heat (375°F) for my Cuisinart Classic Waffle Maker—this ensures a golden crust without burning. Lightly grease the plates with butter or nonstick spray before pouring the batter. For even cooking, pour the batter onto the center of the iron and let it spread naturally. Avoid overfilling—½ cup per waffle is perfect for most irons. 🔥
Avoiding Common Mistakes
Don't rush the cooking process—opening the waffle iron too soon releases steam and ruins the texture. If your waffles come out pale in the center, increase the cooking time by 30 seconds next time. For extra crispiness, cook them until the edges are deep golden brown. And here's a pro tip: If your waffles stick, your iron isn't hot enough. Always preheat for 5 minutes before adding batter.
Herb and Spice Boosts
Want to elevate your waffles? Swap in Pepper Jack cheese for a spicy kick or add 1 teaspoon of smoked paprika to the dry ingredients. Fresh herbs like chives or dill add brightness—just fold them in at the end. For a savory twist, sprinkle everything bagel seasoning on top before serving. These small additions transform your waffles from ordinary to extraordinary without extra effort. 🌿
Make-Ahead Magic
Batter can be prepped 1 day ahead and stored in the fridge, but cook the waffles fresh for best results. For meal prep, cook the waffles and freeze them in a single layer on a tray before transferring to an airtight container. Reheat in a toaster for 2-3 minutes until crispy. Pro tip: Stack them with parchment paper between layers to prevent sticking. Reheated waffles are perfect for quick breakfasts or even a savory lunch with a fried egg on top. ⏰
Nutrition facts
Frequently asked questions
Can I make these waffles without a waffle iron?
Use a preheated skillet or griddle set to medium heat. Pour ¼ cup batter per circle and cook for 2-3 minutes per side until golden brown. For a waffle-like texture, use a waffle-shaped cookie cutter to press the batter into a grid pattern before flipping. The edges won't be as crispy, but they'll still be delicious!
What's the best cheese for these waffles?
Sharp cheddar is ideal for its smooth melt, but you can experiment! Mozzarella adds stretchiness, gouda gives richness, or Pepper Jack brings heat. Avoid pre-shredded cheese—it contains anti-caking agents that prevent proper melting. For extra flavor, mix ½ cup cheddar with ½ cup Parmesan for a savory twist.
Why are my waffles dense instead of fluffy?
Overmixing the batter develops gluten, making waffles tough. Fold dry ingredients just until combined—you should still see flour streaks. Also, ensure your baking powder is fresh (test with the hot water trick) and don't skip whisking the eggs until smooth. If the batter seems too thick, add 1 tablespoon milk at a time.
Can I add other ingredients to the batter?
Yes! Try 1 cup cooked bacon bits for a savory version, ½ cup corn kernels for sweetness, or 1 cup sautéed mushrooms for umami. For extra richness, fold in 2 tablespoons sour cream or ¼ cup Greek yogurt. Herbs like chives or dill add freshness—just mix them in at the end. Keep additions to 1 cup total to maintain texture.
How do I reheat leftover waffles?
For best results, reheat in a toaster or toaster oven for 1-2 minutes until crispy. If using a microwave, cover with a damp paper towel and heat for 10-15 seconds—this prevents drying. To revive texture, sprinkle water or milk on the waffle before reheating. For extra crispiness, broil for 30 seconds after toasting.